background

Thursday, December 29, 2011

The Creche


Every year for the past few Christmas' I have received a piece of the Willow Tree Nativity Scene. I really love it becuase its simple, very neutral in its colourings and it fits so nicely on my mantle. I really wanted the Creche that you can purchase however the creche itself can run about $80 and upwards in the end. See.... http://www.amazon.com/Willow-Tree-26106-Creche/dp/B000CR2NBA Hmmm...dont need it that bad.

however this year my hubby decided to make one for me ...b/c he too is Dutch! He was fortunate to receive some barnwood from our neighbour and here is his handy work. He is quite proud of it ( as he should be) and loves to show as many people as I do!


Friday, November 11, 2011

The Wreath!

I have been working on this for a long time...really a long time. I kinda stopped because I think in the end I made it too big b/c being dutch I didnt want to waste the spray foam in making the wreath itself..But I like it, and it pops on my newly painted black front door!

Because I wanted a square wreath, I took a square piece of cardboard, cut my wreath size and sprayed spray foam on it for a bit of definition. Looking back now...It was a bit too big..Oh well lesson learned...it still looks good...just more work to cover!


So here is the front..spray foamed

I cut strips of burlap, folded them over a rolled, glued and even sewed them up to look like rosettes. I also rolled to wreath itself in strips of the burlap to cover the ugly spray foam

Almost done!


Here it is..finally finished with a nice bright D on it. Not sure I love the D yet...but needed some colour to punch it up!


Monday, November 7, 2011

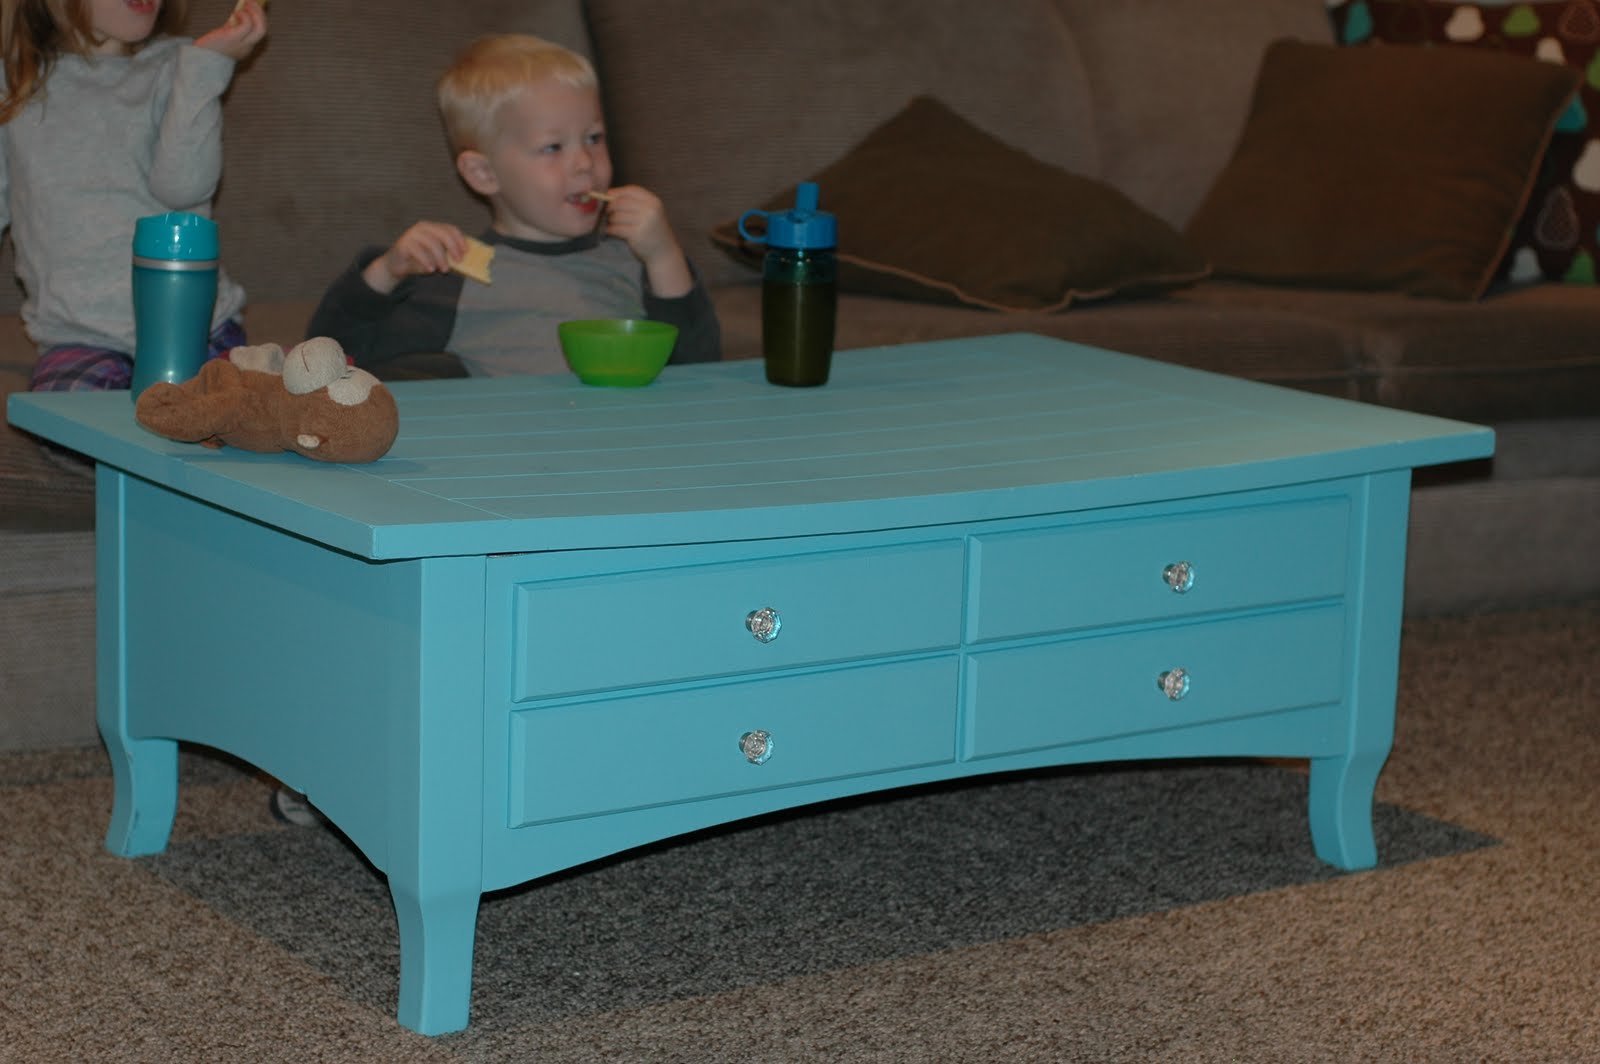
My new to me Table


So our neighbours down the road were getting rid of a few items..and mentioned that had this old table. It was nothing pretty ( her words not mine!) but our current table downstairs was getting somewhat annoying to use. It was a pedestal style table and when an kid (or adult) leaned on table even slightly........the coffees were a flying! So I figure I would take it and see how I could transform their table to brighten my room ( and keep coffee in the mug!)


Sorry for including the ladder, small space to work in and had to share with my painting hubby!

So I first put 2 coats of primer on so that the colour would be bright! And then on to 2 coats of colour (P.S. as a side note after the first colour coat, I had a back spasm and I do have to give credit to my hubby who did the 2nd coat and brought it down to the basement!)

We added some nice glass knobs for the pretty effect and Voila!! A new table with a lotta colour to brighten up my grayish basement!


Thursday, May 19, 2011

Kids Car Caddy

So we are headed on a few trips soon...YEAH!! summer coming soon! Although really with all this rain we are getting...its hard to tell! So both boys have been moved to the back of the bus! But of course this means we'll hear alot of "mom...can you pass me this...and can I have that...I want a book!" So I Googled a few kids car caddies. I did see a really nice one that someone sewed...
but I just don't feel like buying the pattern and trying it out...plus, I still have a few other projects on the go and didn't want to do something time consuming....AND then it hit me.....See what I did with a simple Wipe box...

Wipes Box (sorry for the bad pic!), I cut off the top flaps of the box


Bought a big jar O' Mod Podge....


Quickly fixed the missing spot in the bottom of the box with a piece of the original flaps


And now the fun begins. I took some nice scrapping paper I wasn't using, and modge podged the whole box! Now its not perfectly applied by any means, as the paper itself kinda wrinkled a bit when I "podged" it down...oh well...it was my first time!


So then, I took another piece of cardboard from another box ( although you could use one flaps from the wipes box and made a "divider". I used some of the paper scraps to create flaps on either side of the divider so when I placed it into the box, there would be something to adhere it to. You can see that the divider peeks out and is shorter than the scrap paper use, thus creating "wings"


Hot glued the divider in place ( just right to hold a DVD case) and then mod podged the paper on either side down

And Voila, a nice box, that is pretty sturdy as well. Its already seat belted into the van for our first travel. I packed it with some books, reading and colouring, a cup filled with pencil crayons, and a sharpener, kleenexs, small toys, some DVDs and paper. Just some thing to keep the boys occupied.

I belted it in not because I'm worried if IT gets into an accident, but then at least I know it wont go anywhere if we stop suddenly!!


Saturday, April 23, 2011

DIY Footstool

I had originally found my glider for the baby room on Kijiji for $40.00. Now the material wasn't the nicest but I figured I could recover it ( which I did!) but it didn't come with a footstool, which would have been SOOO nice to have at the beginning when I was breastfeeding. Anyways...after keeping my eyes open for various options, I snagged this table at a garage sale for $5.00!! It was just a pine colour, so I sprayed her up in a nice clean white!! ( I forgot to take a picture of the table before, sorry!!)

Then I went to Walmart and picked up a piece of foam...what...24x16 inches??? Perfect...that happened to be the dimensions of the top of the table...no cutting.


I added on some batting from making quilts to soften all the edges where I would pull the material, and I had the perfectly sized piece of material left from the chair to put on the top. Out comes the heavy duty stapler, I folded over the material so it would have a nice clean edge.


And Voila!....a nice footrest...or even a bench when all the babies are done their rockin'!


Friday, April 22, 2011

Easter Mantel

I generally don't decorate for holidays/seasons, with the exception of Christmas, but was wanting my house to feel more "spring like". Seeing variations of this set up on some blogs, I set out to see how I could do it in mine. I got the tiny little Apocrathy jar on kijiji for $2, the 2nd vase from my own collection, and the 3rd from Pier 1 ( on clearance). It was still expensive enough since I generally don't spend alot on decorations for the house. I added in some moss from the Dollar Store, some larger eggs form Pier 1 (again on 20%) and a few smaller eggs donated by my friend Rachel. All in all I love the look thats not only for Easter but for spring in general. Now....to start thinking about summer...


Monday, April 18, 2011

Easter Basket


So this might not exactly be something I created, but re-created. I wanted to get a similar easter basket for G but knew I wouldn't find one. I stopped in at a garage sale and found this one and thought...hmmm it looks similar...but the colours weren't really easter.


So off to Home Depot to see what I could find to change up the drab basket. So I added in some Carribean Blue Spray Paint...


And Voila!!! New easter Basket for under $5.00...I might even get 2 more colours and re-do the other boys baskets....